Quick Answer: A professional one day garage floor coating installs in 6 to 8 hours. Our West Michigan crew arrives around 8 AM and works through four stages: diamond grinding and surface prep, a polyurea base coat with a full flake broadcast, a scrape-and-vacuum cleanup, and a polyaspartic topcoat to seal it all. You can walk on the floor that evening and park a car on it within 24 hours.
The reason it fits in one day comes down to chemistry. The polyurea and polyaspartic system we install cures in hours, not days. Standard epoxy needs 3 to 5 days because each coat has to cure slowly before the next one goes down. Our one day garage floor coating system lets you drop your stuff off in the morning and have a finished, warrantied floor by dinner.
One Day Garage Floor Coating What Happens Before We Arrive
The day goes faster when the garage is ready. A few days before your install, you’ll want to:
- Clear everything off the floor. Cars, totes, tools, bikes, the spare fridge. The crew needs the entire slab open.
- Move wall items below 3 feet. Anything mounted higher than waist level can usually stay put. Lower items get bumped during edge grinding.
- Turn off the garage HVAC or fridge on install day so dust and fumes aren’t pulled into the house.
- Hold off on yard work that morning. Mowing or trimming near an open garage sends grass and grit onto a wet coating.
If you don’t have anywhere to put your garage contents, we bring a trailer you can load your items into and keep on-site for a few days while the floor cures. That solves the biggest headache most homeowners worry about before a one day garage floor coating install.
Hour 0 to 1 — Arrival, Walkthrough, and Setup
The crew arrives around 8 AM to begin your one day garage floor coating install. Our trucks are set up as mobile workshops, so everything needed for the day comes with us: diamond grinders, dustless vacuums, base and topcoat materials, and your selected flake blend.
The first thing we do is walk the garage with you. We confirm your color and flake choice, point out any cracks or low spots in the slab, talk through the cure timeline, and answer any questions. Then we tape off walls and thresholds, stage the equipment, and get the dust containment set up before a single grinder touches the floor.
Hour 1 to 3 — Diamond Grinding and Surface Prep
This is the most important step in the entire one day garage floor coating process, and it’s why a professional floor lasts decades while a DIY kit peels in a year.
We mechanically grind the entire slab with diamond tooling, edge to edge and into every corner. Grinding does two things: it strips off old coatings, paint, oil, and contaminants, and it opens up the pores of the concrete so the coating can bond deep into the slab instead of just sitting on top. Our grinders run with self-contained, dustless vacuum systems, so your garage and home stay clean throughout.
A coating is only as good as the prep underneath it. Most failed garage floors didn’t fail because of the product. They failed because someone skipped the grinding.
We never use acid etching. Acid etch is faster and lower-cost, but industry surface-prep guidance consistently ranks it as a weaker bonding method than mechanical grinding, and it’s one of the leading causes of peeling and delamination in this climate. Diamond grinding to a proper concrete surface profile is the only prep method we use.
Hour 3 to 4 — Crack Repair and Final Cleanup
Once the slab is profiled, we go back over it and address the imperfections. Cracks get filled with a structural-grade repair compound. Pits, spalls, and divots get patched. Control joints get treated based on how you want them handled.
After repairs, we vacuum and blow the entire floor one more time. The slab has to be completely free of dust and debris before any coating goes down, because even fine grinding dust trapped under a base coat can compromise the bond. By the end of this stage, the concrete is profiled, repaired, and surgically clean, ready for coating.
Hour 4 to 5 — Polyurea Base Coat and Flake Broadcast
Now the transformation starts. We apply the polyurea base coat across the entire slab, starting with vertical edges and steps, then rolling out the main floor for full, even coverage.
While that base coat is still wet, we broadcast the vinyl flakes by hand, throwing them up so they fall evenly across the surface. We use a full broadcast, which means we put down far more flake than the floor can hold so that every square inch is covered. The flakes do three jobs: they add traction (critical for a floor that sees melted snow and salt all winter), they hide minor imperfections in the slab, and they give your floor its color and texture.
The polyurea base bonds aggressively into the concrete you just watched us grind, and it acts as a moisture barrier between the slab and the rest of the system. Because polyurea cures fast, we’re ready for the next step in about an hour instead of waiting overnight.
Hour 5 to 6 — Scrape, Vacuum, and Prep for Topcoat
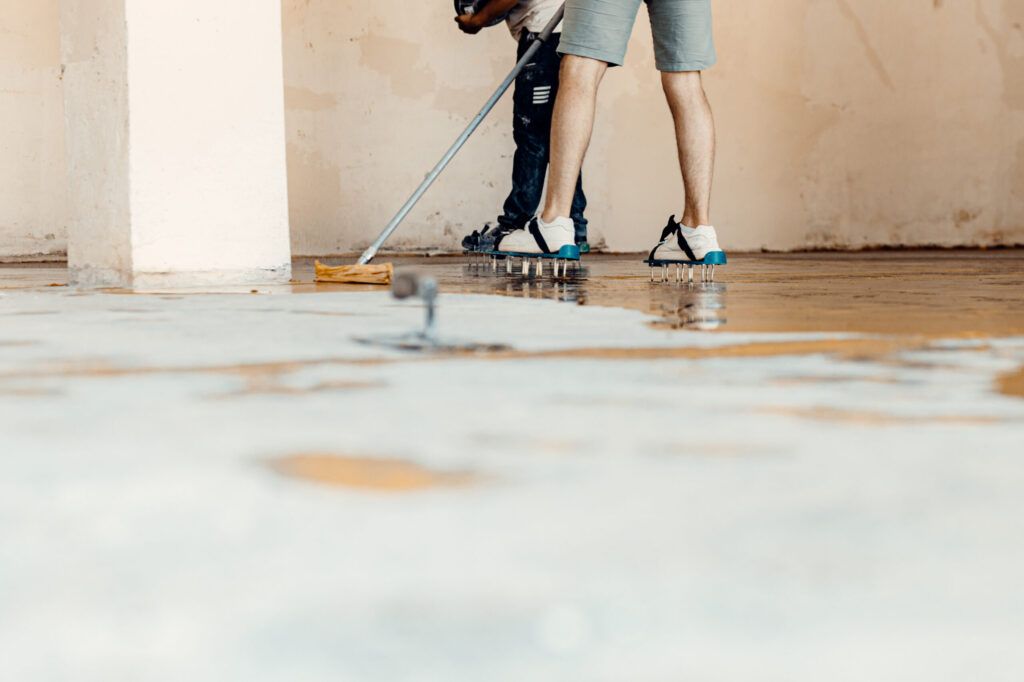
Once the base coat has set, the floor is covered in loose, standing flakes that didn’t bond. We scrape the entire surface in multiple directions with a flat blade to knock down the sharp, upright flakes and remove the excess.
Then we vacuum and blow the floor again, collecting all the loose flake material. What’s left is a smooth, even, fully colored surface that’s ready to be locked in. This scrape-and-vacuum step is what separates a smooth, comfortable floor from a rough, sandpapery one.
Hour 6 to 8 — Polyaspartic Topcoat and Final Walkthrough
The final layer is the polyaspartic topcoat. We apply it with a squeegee and then back-roll it to spread a thick, even, consistent coat across the whole floor. This is the layer that takes all the daily abuse for the next couple of decades.
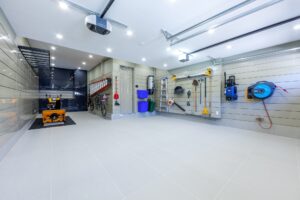
The polyaspartic topcoat is what gives your one day garage floor coating its durability and its long-term good looks. It’s UV stable, so it won’t yellow or amber under garage lighting or sunlight. It resists road salt, motor oil, hot tire pickup, dropped tools, and chemical spills. And it seals the flake layer into a single, non-porous surface you can clean with a mop or a hose.
Once the topcoat is down, we do a final walkthrough, clean up the entire job site, load the truck, and hand you a care sheet. The only thing we leave behind is your finished floor.
One Day Garage Floor Coating Cure Timeline After We Leave
The floor is done, but it needs a little time to reach full strength. Here’s the typical timeline for a West Michigan garage:
| Time After Topcoat | What You Can Do |
|---|---|
| 2 to 4 hours | Surface is touch-dry |
| 6 to 12 hours (that evening) | Light foot traffic is fine |
| 24 hours | Park a single vehicle back on the floor |
| 48 to 72 hours | Full vehicle traffic and normal use |
| 7 days | Full chemical cure, ready for anything |
Cooler temperatures stretch these windows a little, and your crew lead will give you exact timing based on the weather the day of your install. There’s usually a mild odor for the first 12 to 24 hours as the coating finishes outgassing, which is why we crack the garage door and keep the interior HVAC off during cure.
Why a One Day Garage Floor Coating Is Even Possible
A lot of homeowners are skeptical that a floor done in one day can last. The skepticism is fair, because for years it wasn’t possible. Traditional epoxy genuinely does need 3 to 5 days, since epoxy cures slowly and needs warm, dry conditions between coats.
The difference is the chemistry. Polyurea and polyaspartic are aliphatic coatings, originally engineered for industrial and bridge applications. They cure in roughly an hour per layer instead of a full day, they bond more aggressively to concrete, and they stay slightly flexible so they move with the slab through Michigan freeze-thaw cycles instead of cracking. Fast cure and better performance aren’t a trade-off here. You get both.
One day on-site. Decades of performance. That’s the whole point of a one day garage floor coating done right.
Depending on the system thickness you choose, your floor is backed by a 10-year, 21-year, or lifetime warranty. For a full cost breakdown by garage size, see our garage floor coating cost guide. Call (616) 438-0748 to talk through color and flake options before you book.
One Day Garage Floor Coating FAQs
Is a one day garage floor coating actually durable?
Yes. The speed comes from the polyurea and polyaspartic chemistry curing in about an hour per layer rather than needing days like standard epoxy. Properly diamond-ground and installed, these floors carry 10-year, 21-year, or lifetime warranties.
What should I do to prepare for a one day garage floor coating install?
Clear everything off the floor, move wall-mounted items below 3 feet, turn off the garage HVAC or fridge, and skip yard work that morning. If you need somewhere to store your belongings, ask about a trailer for on-site storage during the cure.
How long until I can park my car after a one day garage floor coating?
You can walk on the floor the same evening, park a single vehicle after 24 hours, and resume full vehicle traffic after 48 to 72 hours. Full chemical cure takes about 7 days.
Why does epoxy take 3 to 5 days but this system takes one day?
Standard epoxy needs 24 to 72 hours of cure time between each coat. Polyurea and polyaspartic cure in roughly an hour per layer, so the entire multi-layer system can be applied and cured in a single 6 to 8 hour workday.
Does a one day garage floor coating include crack repair?
Yes. After diamond grinding, cracks are filled with a structural-grade repair compound and pits or spalls are patched before any coating is applied, all within the same one-day timeline.
Ready to Book Your One Day Garage Floor Coating?
Garage Kings West Michigan installs polyurea-polyaspartic floors across Grand Rapids, Ada, Cascade, Forest Hills, East Grand Rapids, Caledonia, Rockford, Hudsonville, Holland, Kentwood, Wyoming, Grandville, and nearby West Michigan communities. Most garages are completed in a single day, backed by 10-year, 21-year, or lifetime warranties depending on the system, and we bring a trailer so you have somewhere to store your garage contents while the floor cures.
Call (616) 438-0748 or request your estimate online. We’ll measure your slab, walk you through your color and warranty options, and schedule your one day garage floor coating.